The first time you put a slide on your finger and drag it across a string, something feels completely wrong. The notes are muddy, everything buzzes, and the string you wanted sounds like three strings having an argument. That’s not failure — that’s every intermediate guitarist’s introduction to slide.
If you’re looking to learn slide guitar, the fastest path that actually sticks is starting in standard tuning. You skip the detour of relearning chord shapes in open E or open G, and you stay in a system your hands already know. The technique — intonation, muting, controlled vibrato — is the same no matter what tuning you end up in later. And the blues rock vocabulary you build here directly transfers to every situation you’ll encounter with a slide.
- Standard tuning lets you apply slide immediately without relearning the fretboard — your existing knowledge of pentatonic shapes becomes your starting point
- Muting is the skill that separates muddy slide playing from clean slide playing — it’s harder than the actual notes, and it must be learned from the first session
- If you can already play basic lead guitar licks, you’re exactly at the right starting point — slide technique builds on that foundation, not from zero
What Slide Guitar in Standard Tuning Actually Means
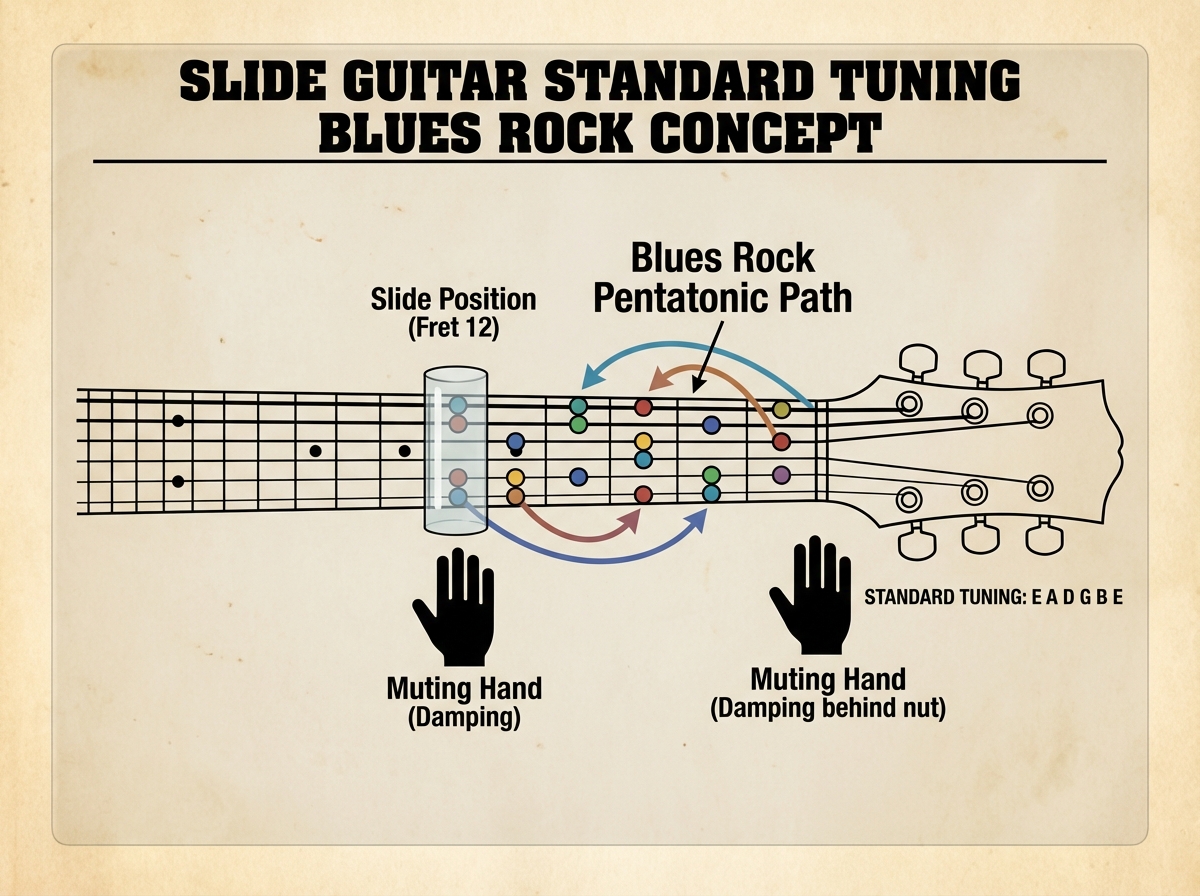
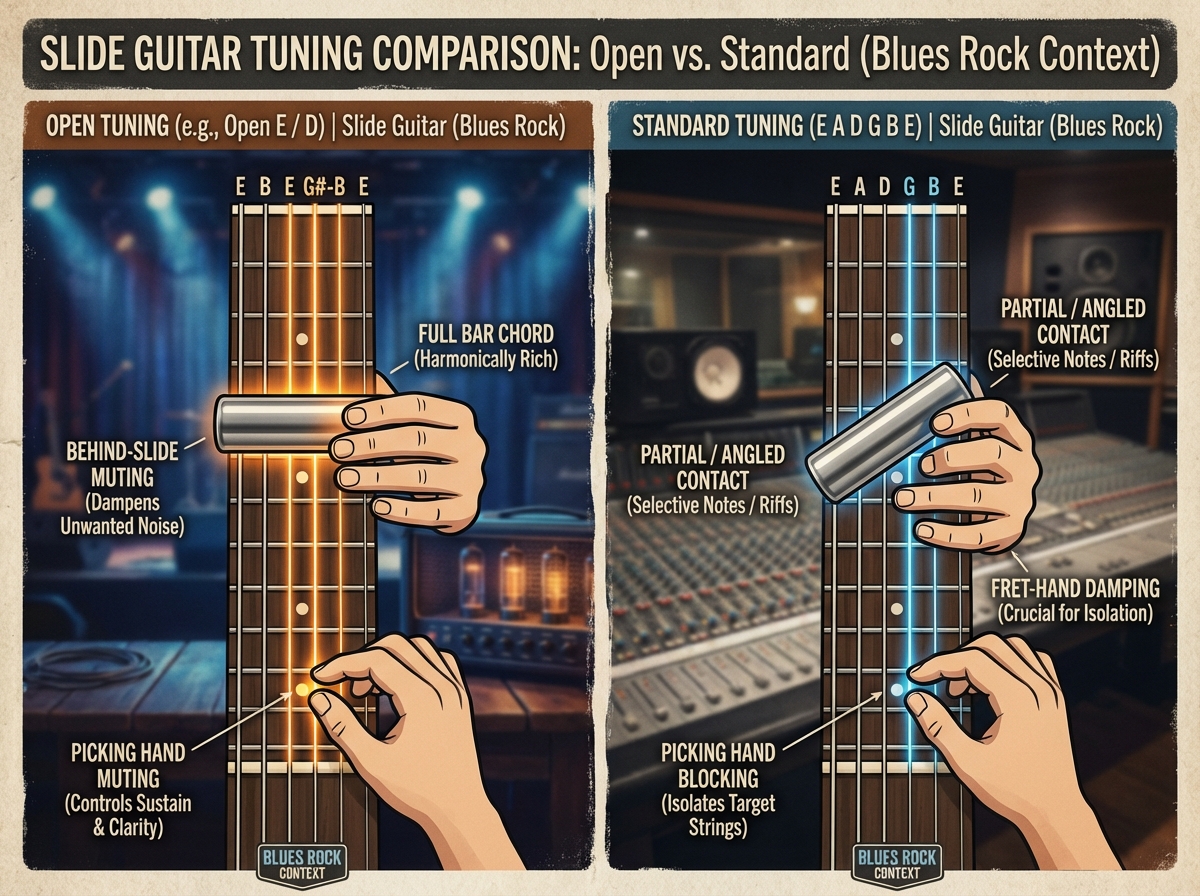
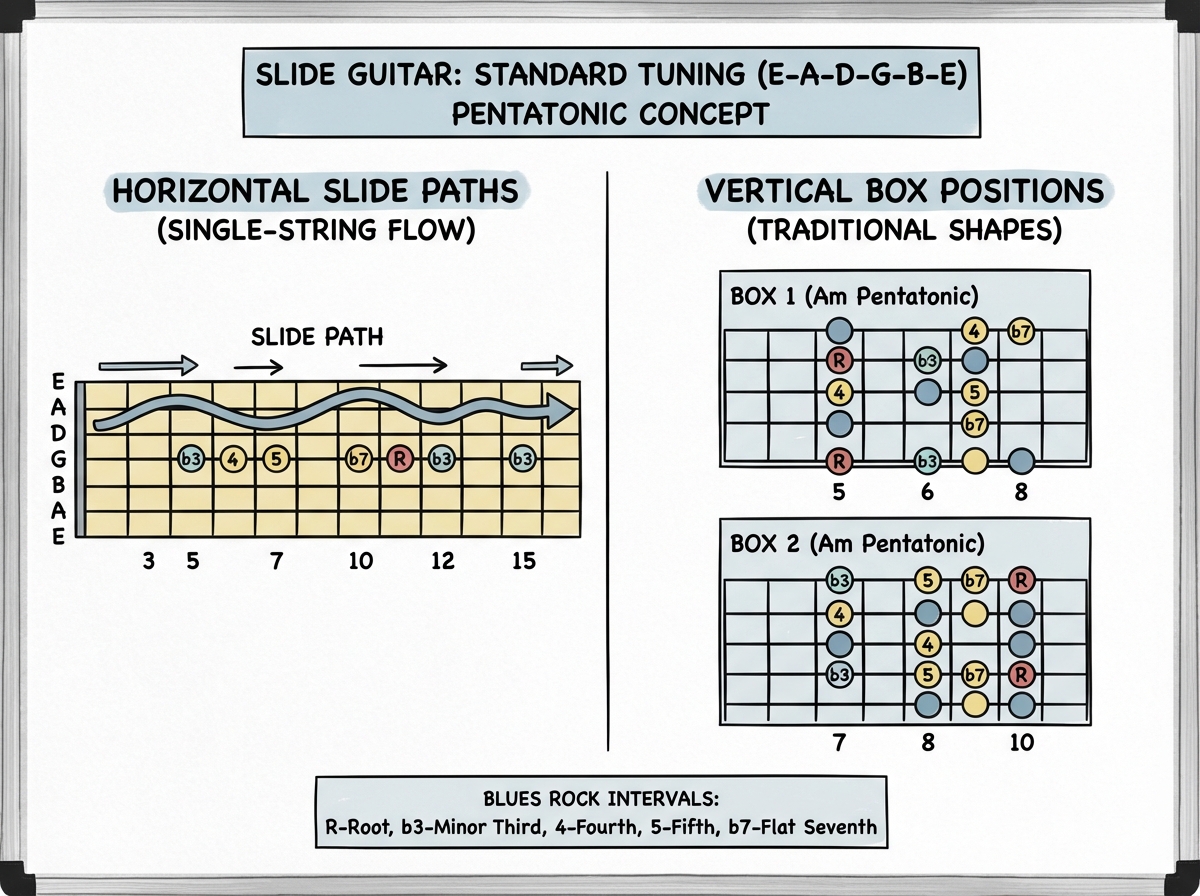
For an intermediate guitarist new to slide, the concept sounds simple: put a glass or metal tube on your finger, lay it across the strings, and move it. But “slide guitar in standard tuning” is a specific discipline with its own logic. Unlike open tunings where laying the slide flat across all six strings gives you a chord, standard tuning requires you to think in single strings, targeted intervals, and constant muting — because most string combinations under a straight slide in standard will sound dissonant.
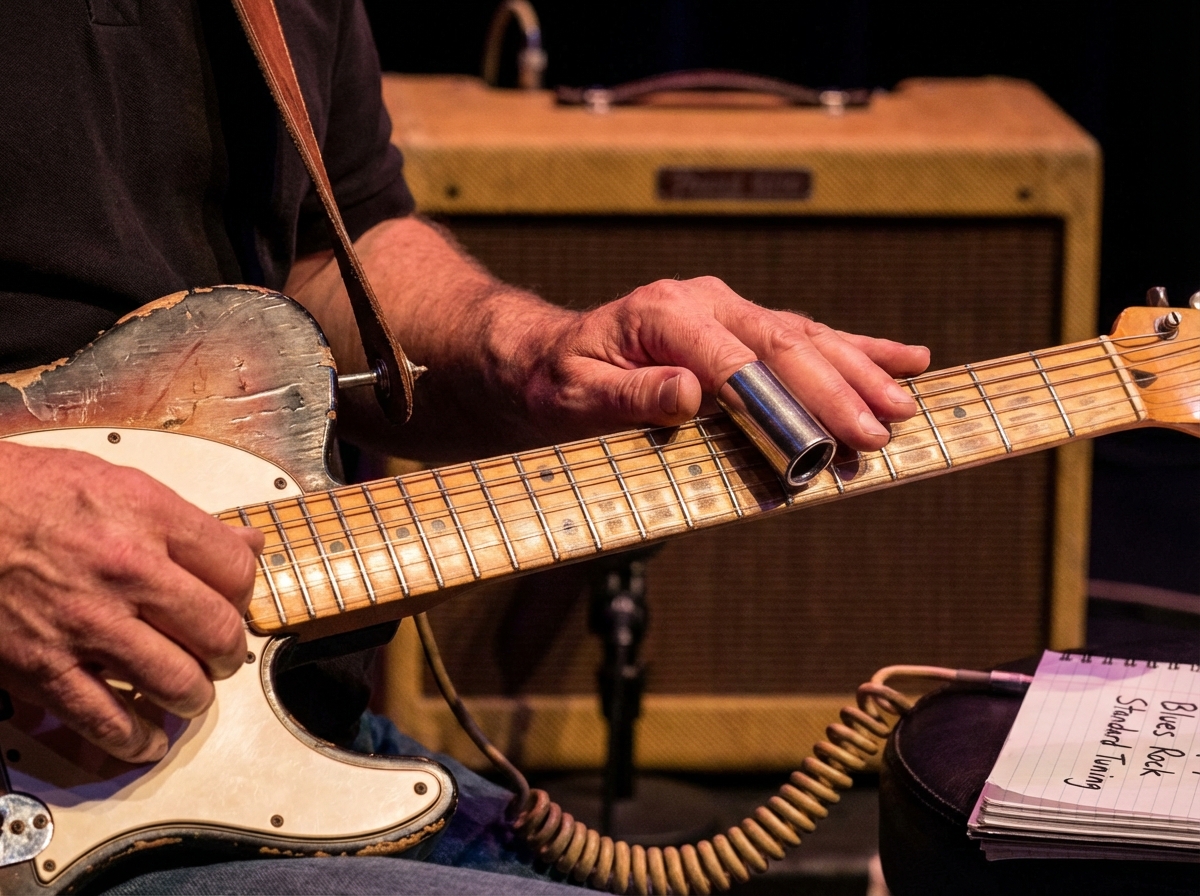
The slide itself sits directly over the fretwire — not behind it the way your fretting fingers normally sit. That shift alone takes conscious unlearning. Your muscle memory from years of pressing behind the fret fights you constantly in the early weeks. The payoff is that once you internalize fret-over placement, your intonation locks in and those messy, flat-sounding notes start resolving into the clean, singing tone that makes blues rock slide guitar feel like nothing else.
| Approach | Chord Under Slide | String Control | Fretboard Knowledge |
|---|---|---|---|
| Open Tuning (E/G/D) | Full barre = chord | Easier to avoid dissonance | Must relearn positions |
| Standard Tuning | Must target specific strings | Demands active muting | Existing knowledge applies |
Three Things That Are True That No One Tells You
- Slide guitar in standard tuning is mostly a muting problem, not a pitch problem
- The pentatonic scale you already know works — but only if you play it horizontally, string by string
- Vibrato is the signature of a slide player; without it, every note sounds like a mistake
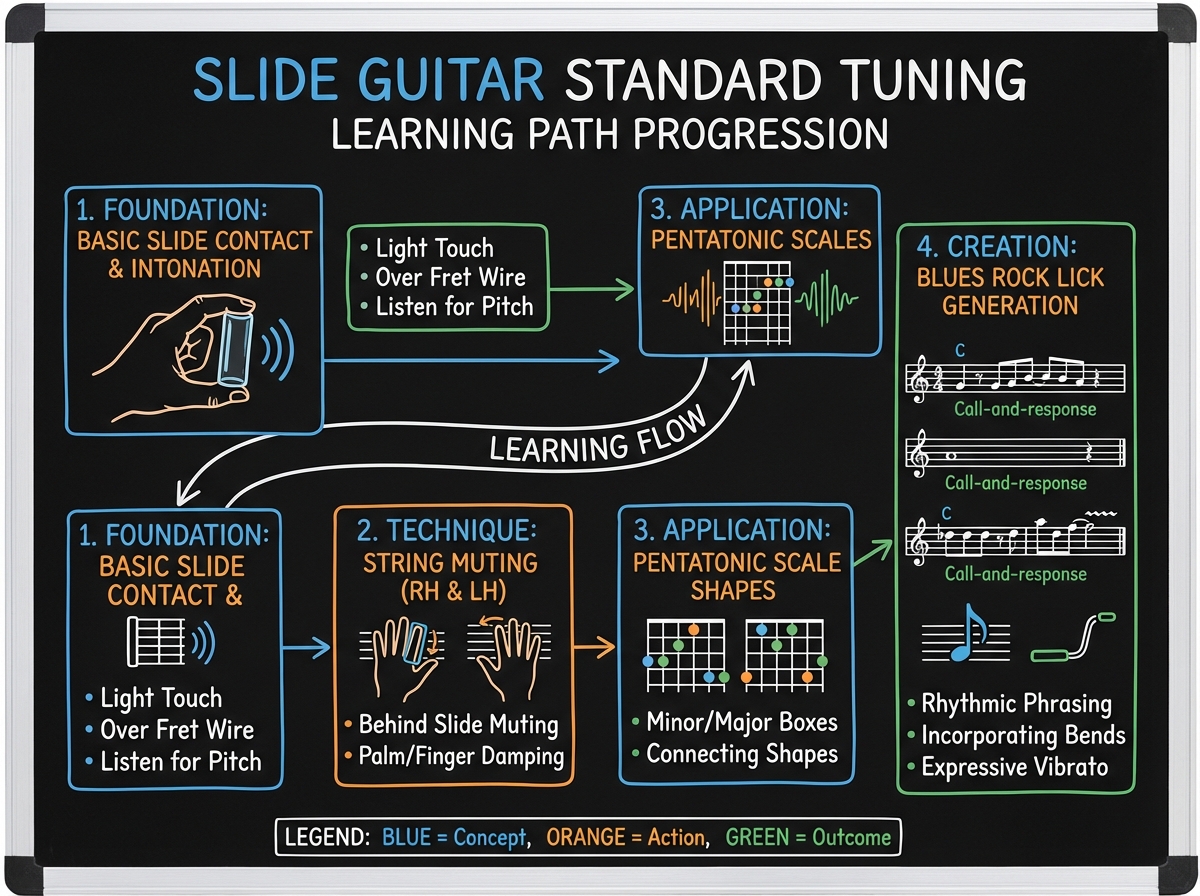
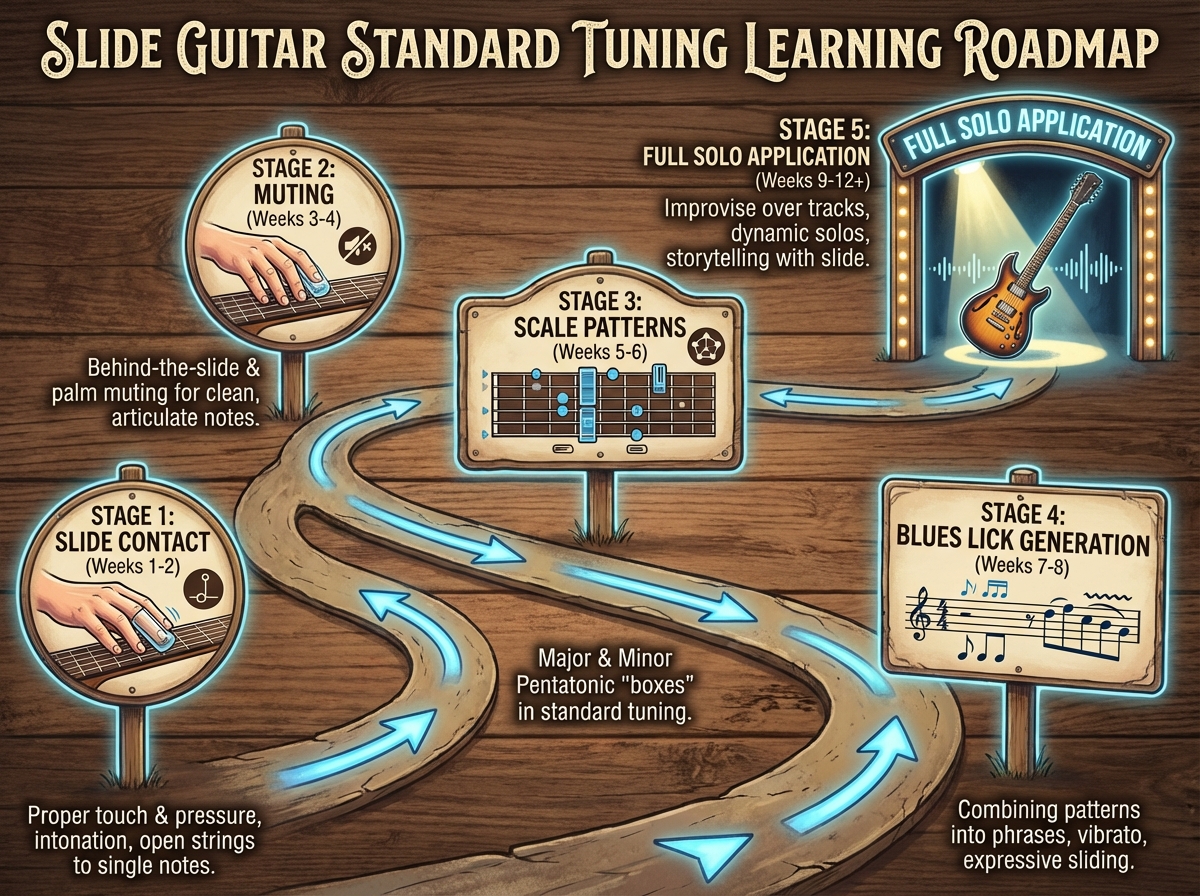
How Long It Actually Takes to Sound Like You Know What You’re Doing
| Stage | What You’re Working On | Time |
|---|---|---|
| Basic contact & intonation | Placing slide over fret, hitting single clean notes | 1–2 weeks |
| Muting fundamentals | Right-hand palm muting + left-hand fingers behind slide | 2–3 weeks |
| Scale shapes & patterns | Horizontal pentatonic, position awareness in standard tuning | 2–4 weeks |
| Generating licks | Combining shapes into repeatable blues rock lick vocabulary | 3–5 weeks |
| Full solos in context | Playing over jam tracks, connecting licks with feel | Ongoing |
| Total | From first slide contact to confident soloing | 8–14 weeks |
The order matters more than the speed — trying to learn licks before your muting is solid means building on sand. And if you’re at twelve weeks and still cleaning up your technique, that’s normal: most players rush the muting stage and pay for it later.
The Slide Goes Where Your Brain Doesn’t Expect
The first real wall hits during basic technique. You know where the note is on the fretboard — you’ve known that for years. But the slide keeps arriving slightly behind the fret, and the note sounds flat. You adjust, overshoot, and it goes sharp. The problem is that your hand is still moving like it’s fretting, stopping short of the wire instead of sitting directly on top of it.
The fix isn’t just awareness, it’s repetition with immediate feedback. Play over a drone or a jam track from the very beginning. Unaccompanied slide practice hides intonation problems because there’s nothing to compare against. The moment you’re playing over a chord, flat notes announce themselves immediately. That friction is uncomfortable, but it’s the fastest calibration tool available.
What changes after this stage isn’t just your placement — it’s how you hear yourself. You start anticipating the target pitch before the slide gets there, which is the foundation of good slide vibrato. You’re not wiggling because it sounds expressive; you’re centering on the pitch and adding motion around it. That shift in intention is the first real breakthrough.
Muting Is the Actual Skill
The single biggest mistake people make learning slide guitar is focusing on the notes and ignoring the noise. You put the slide on string three, hit the note, and strings one, two, four, and five all ring sympathetically in whatever relationship they happen to have to the chord underneath. In standard tuning that relationship is frequently dissonant, and the result sounds like an accident.
Muting in slide guitar is a two-handed operation. The right hand — whether you’re using a pick or fingers — damps the strings below your target note with the fleshy edge of the palm. The left hand, specifically the fingers trailing behind the slide on the same string, kills the behind-fret buzz that would otherwise fill every sustain. When both of those happen simultaneously, the single note you intended is the only note the listener hears.
This is why fingerstyle playing makes early slide easier for most people. The individual fingers have more surface area on each string and make independent muting decisions naturally. If you’re a pick player, this stage forces you to develop a new right-hand palm-muting reflex that feels unnatural for weeks before it becomes automatic. Either way, spending a full session on nothing but muting a single clean note — no licks, no patterns, just one note ringing clean — is the most productive thing you can do at this stage.
Scale Shapes Don’t Work the Way You Think
Every intermediate guitarist arrives at slide with a toolkit of pentatonic shapes — the minor pentatonic box positions they’ve been using for lead playing. The instinct is to apply them directly, letting the slide trace the same paths the fingers used to. This doesn’t work. The shapes were designed for vertical movement across strings; the slide moves horizontally along a single string far more naturally, and forcing it into box patterns produces sloppy, uncontrolled string crossings.
The reframe is simple but requires deliberate practice: learn to play each pentatonic position as a single-string, horizontal run. Instead of moving across strings at the fifth fret, you move along the string from the fifth fret to the twelfth and back. Once you’ve done that on every string individually, you have a slide-specific map of the fretboard that works with how the technique moves rather than against it.
For blues rock slide guitar specifically, the intervals you want to land on — the root, flat third, fourth, fifth, and flat seventh — are the same ones you already know from the blues scale. The difference is that the slide gives you access to the microtonal space between those notes, particularly the blue note that lives in the crack between the minor and major third. That’s not a mistake. It’s the sound.
Where Licks Come From
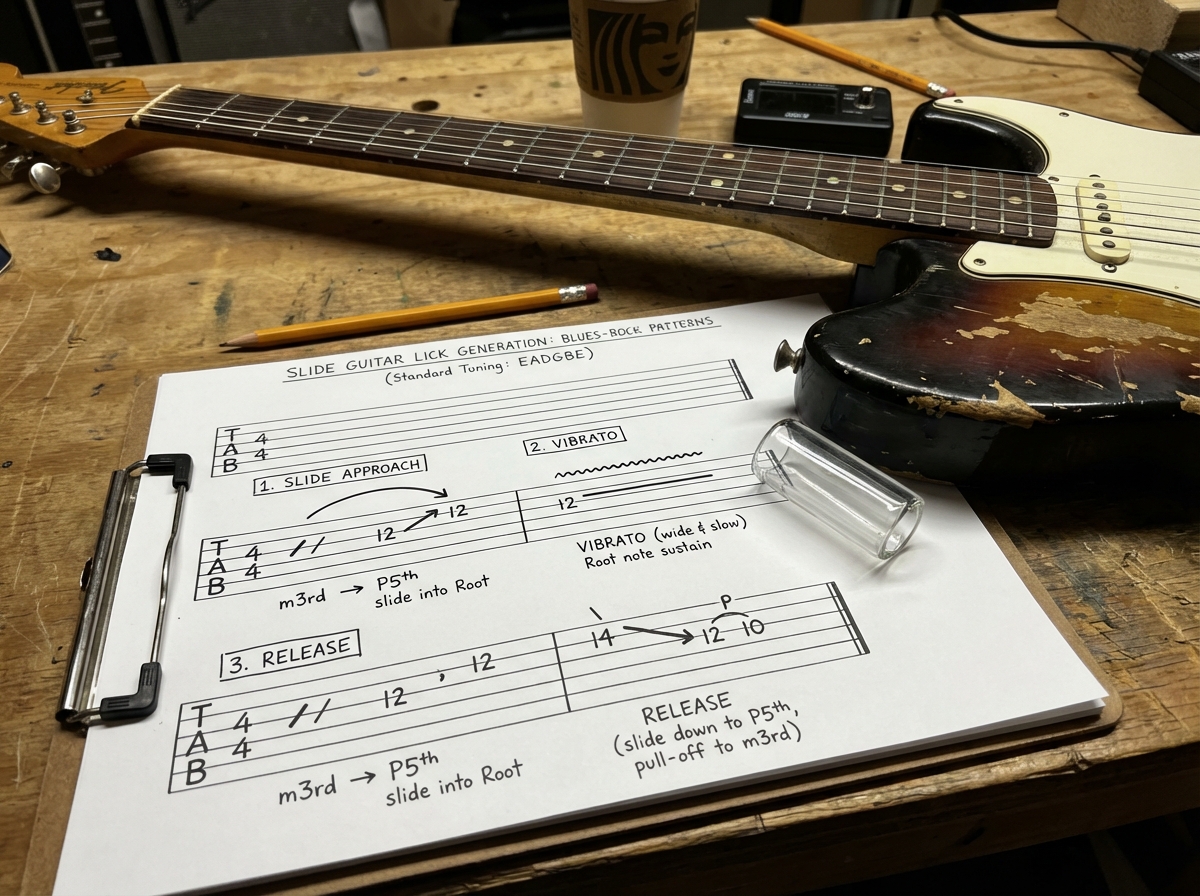
A lick, at its core, is a short phrase with a start point, a destination, and a characteristic motion. In slide guitar, that motion is almost always a combination of slide attack (approaching the target from below), vibrato (centering and decorating the pitch), and a controlled release. The phrase vocabulary of blues rock slide is built from those three elements in different rhythmic configurations.
The process of generating your own licks rather than copying someone else’s starts with taking a single interval — say, sliding from the flat seventh up to the root — and finding every rhythmic shape that phrase can take. Fast approach, slow vibrato. Slow approach, no vibrato, just sustain. Approach on the beat, land late. Each variation is a new lick even though the notes are identical. This is the generative logic underneath the vocabulary of every great slide player: a small number of phrases in a large number of rhythmic and dynamic configurations.
Once you understand that licks are generated by variation, not memorization, the library grows fast. A single afternoon with a jam track and two or three target intervals will produce more usable phrases than a week of copying specific licks note-for-note. This is where the work stops feeling like work and starts feeling like playing.
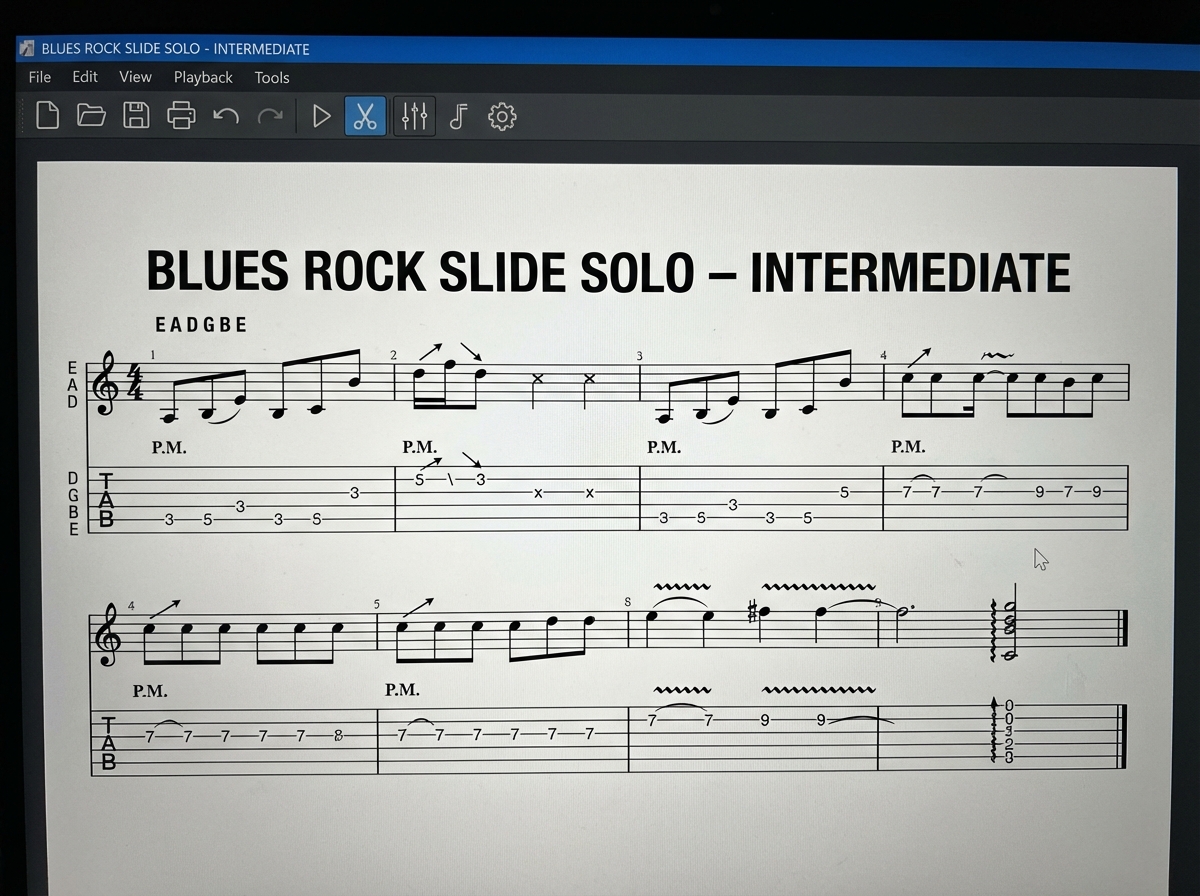
Playing Over Tracks — When It Finally Clicks
There’s a specific moment that happens somewhere around the sixth or eighth week of real slide work. You’re playing over a 12-bar blues jam track, and a phrase comes out that you didn’t consciously construct. The slide went where it needed to go, the muting held, the vibrato landed on pitch, and the phrase resolved. You stop and think: that sounded like a real slide player.
That moment isn’t luck — it’s the result of the technique stages preceding it becoming automatic. The intonation reflex is there. The muting has stopped requiring conscious attention. The scale shapes are accessible without navigation. What’s left is musical decision-making, which is the part that actually sounds like you.
The jam track is doing something that solo practice can’t replace: it’s forcing real-time pitch reference, rhythmic commitment, and musical consequence. A phrase that sits behind the beat feels different over a groove than in isolation. A note that’s slightly flat rings out against the chord and tells you immediately. This is why playing over tracks early — even before your technique is clean — builds musical ears faster than any exercise. If you want to complement this with solid rhythm foundation, understanding how rhythm and beats work on a physical instrument makes your timing instinct sharper across everything you play.
What You Know Now That You Didn’t Before
Slide guitar doesn’t make you a different kind of guitarist. It makes you the same guitarist with a new language — one that happens to be particularly good at expressing feeling directly. The technique is learnable, the theory is minimal, and the vocabulary builds quickly once the fundamentals are solid. What takes time is internalizing the muting to the point where clean notes are the default, not the exception.
Looking back at the journey from that first buzzy, muddy attempt, the stages that mattered most weren’t the flashy ones. It wasn’t learning the coolest lick or figuring out a famous solo. It was the hour spent making a single note ring clean. That hour bought everything that came after it.
Start with one clean note, not a scale. Put the slide on, find any note, and practice making it ring without touching adjacent strings — five minutes of this daily rewires your muting instinct faster than anything else.
Play over a drone or chord the moment you practice. Unaccompanied slide practice is almost useless for intonation — you need pitch context to hear when the slide is flat.
Position the slide directly over the fretwire, not behind it. Check this every session in the early weeks; the habit of sitting behind the fret is deep and will creep back.
Learn the pentatonic positions horizontally first. On each individual string, trace the scale from low to high and back. This builds slide-specific fretboard awareness before you work across strings.
Mute with both hands from day one. Right-hand palm on the strings below the slide, left-hand fingers trailing behind it — treat this as non-negotiable, not optional technique.
Use jam tracks, not just a metronome. Rhythmic precision matters, but a real chord progression gives your intonation and phrase-making immediate, musical feedback.
Keep the vibrato narrow until it’s centered. Wide vibrato on a flat note just vibrates around the wrong pitch. Narrow, controlled vibrato on a centered note sounds more musical than a wide wobble anywhere near the right note.
Work one lick at a time until it’s automatic, then vary it. Pick one slide phrase, play it in every rhythm and dynamic you can think of, then move to the next. Five deep phrases beat fifty half-learned ones every time.
Leave a Reply