The first vinyl decal I ever cut came out looking like a crumpled receipt. I had over-tensioned the blade, the weeding was a disaster, and I nearly threw the whole cutter in a corner. Nobody warned me that a $0.10 piece of vinyl could humble you that fast.
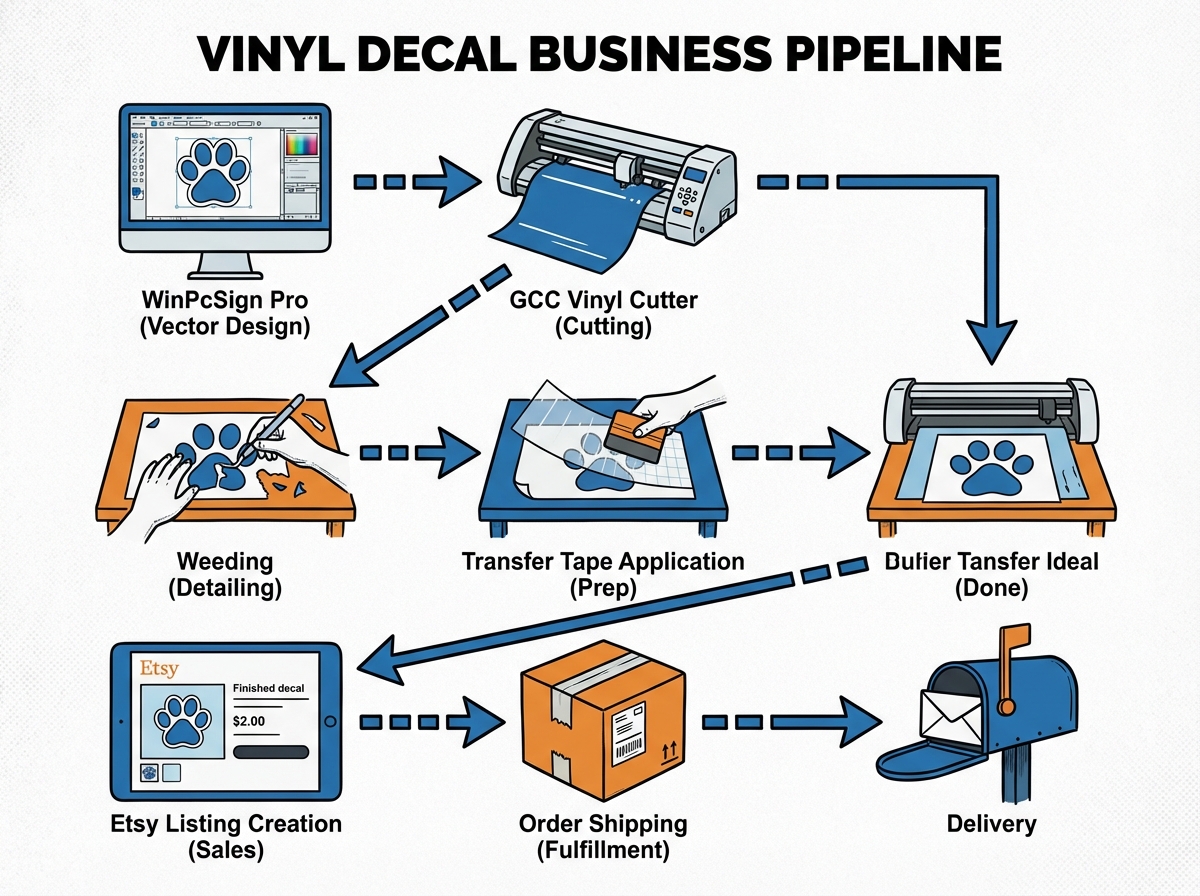
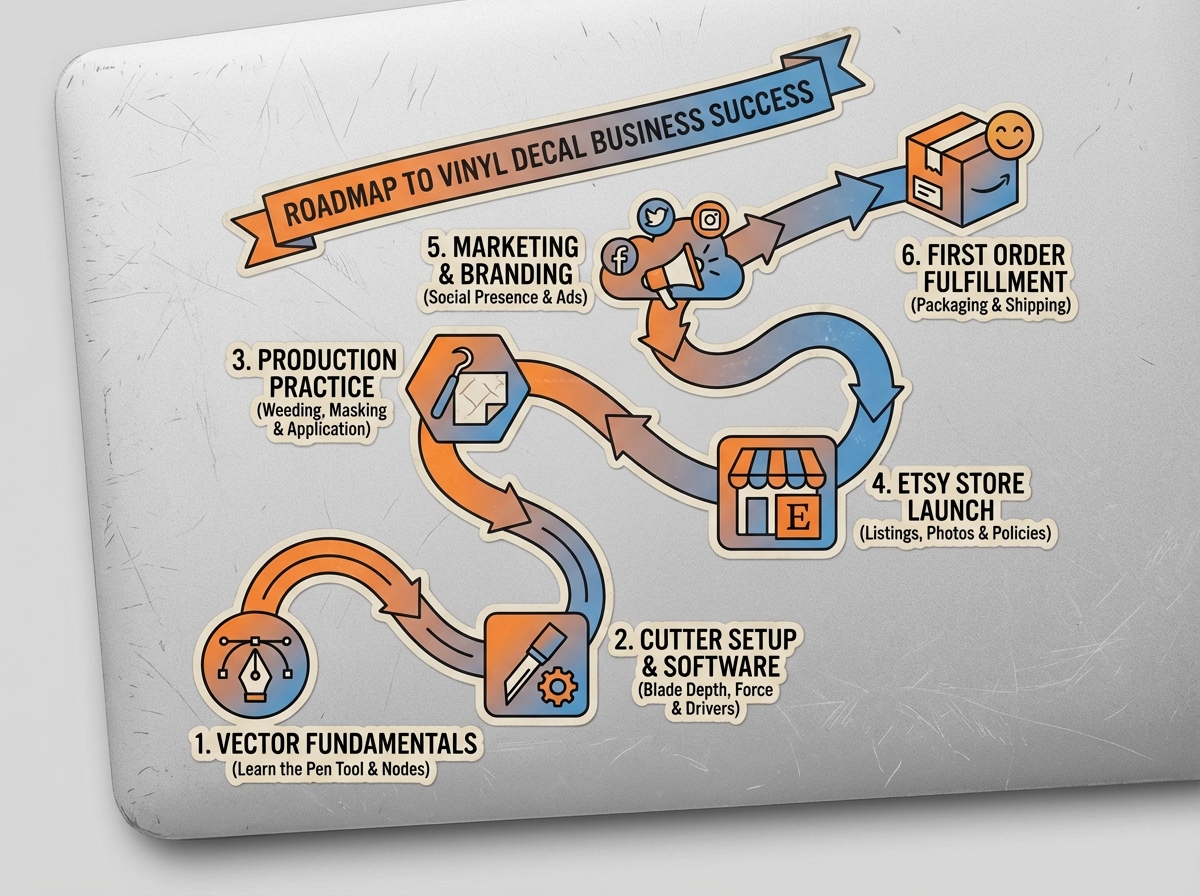
If you’re looking to learn how to make vinyl decals and sell them online, the honest answer is that it’s one of the most accessible home businesses you can start — but only once you stop guessing and start working a real system. Making vinyl decals for profit means mastering three completely different skill sets at once: design, physical production, and e-commerce. Each one has its own learning curve, and most beginners flame out because they try to figure out all three in the wrong order.
- You don’t need a design background to start — but you do need to learn how vector images work before you touch the cutter
- The physical production side (cutting, weeding, transfer tape) takes maybe a weekend to get comfortable with; the business side takes longer
- Most first sales on Etsy come from getting the listing right, not from running ads
What Vinyl Decals Actually Are (And Why the Vector Part Matters)
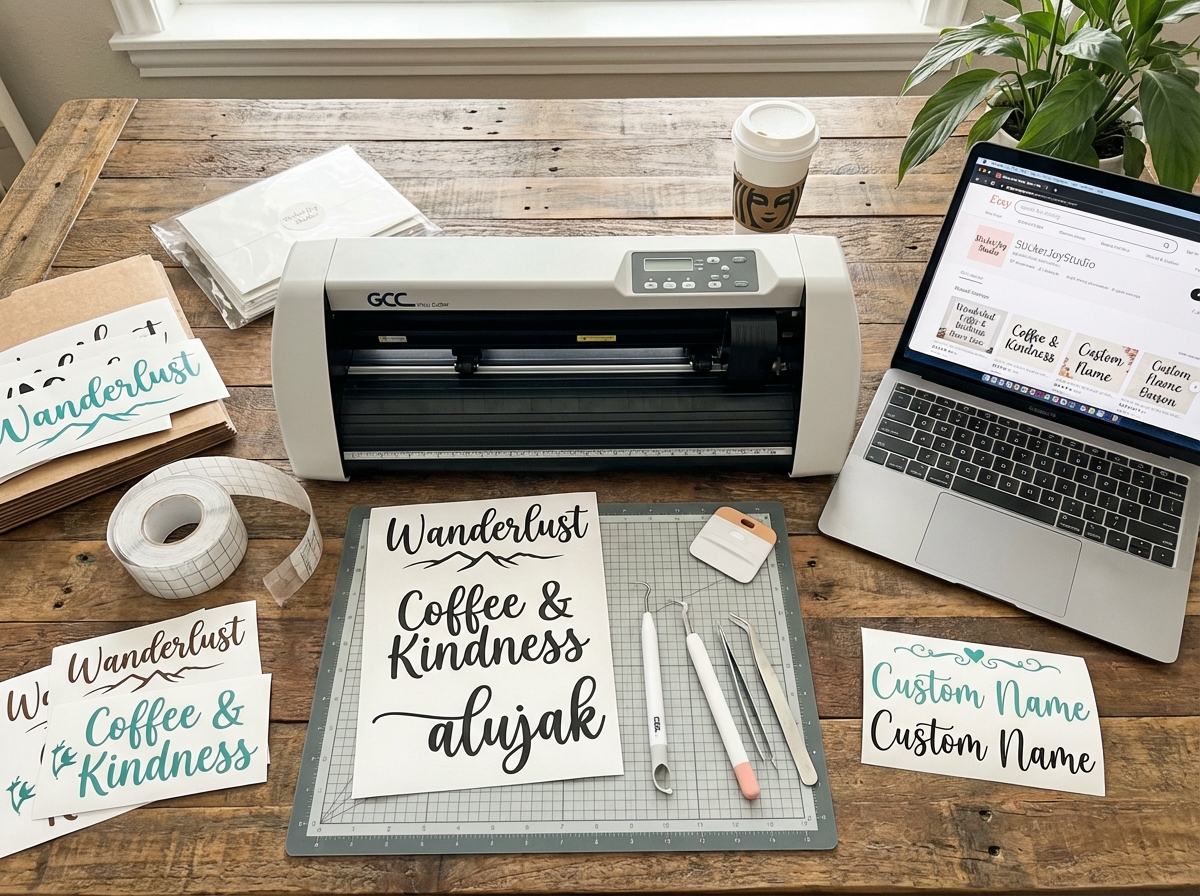
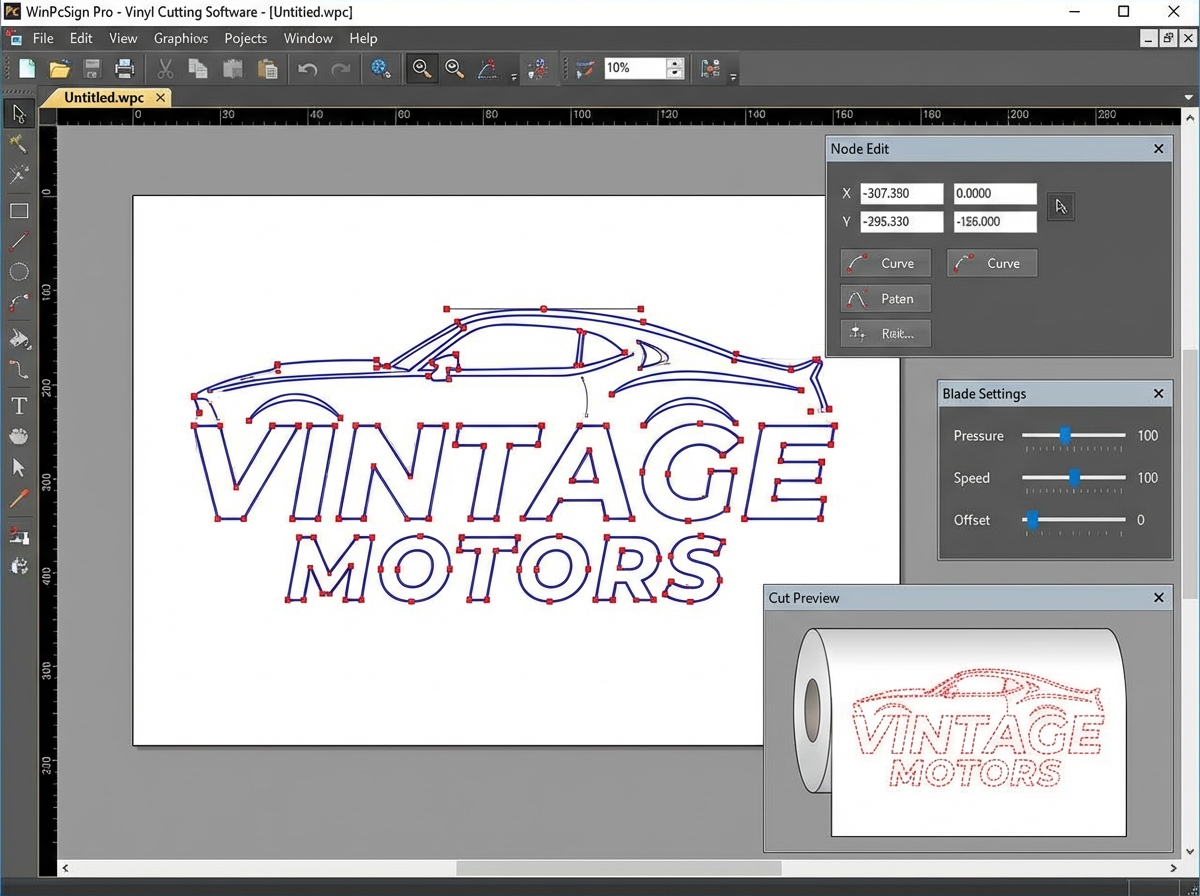
A vinyl decal is a shape or design cut from adhesive vinyl film using a plotter cutter — a machine that drags a small blade across vinyl following a digital path you feed it from software. The result is a clean, precise cut that you then weed (remove the excess vinyl around the design) and apply using transfer tape.
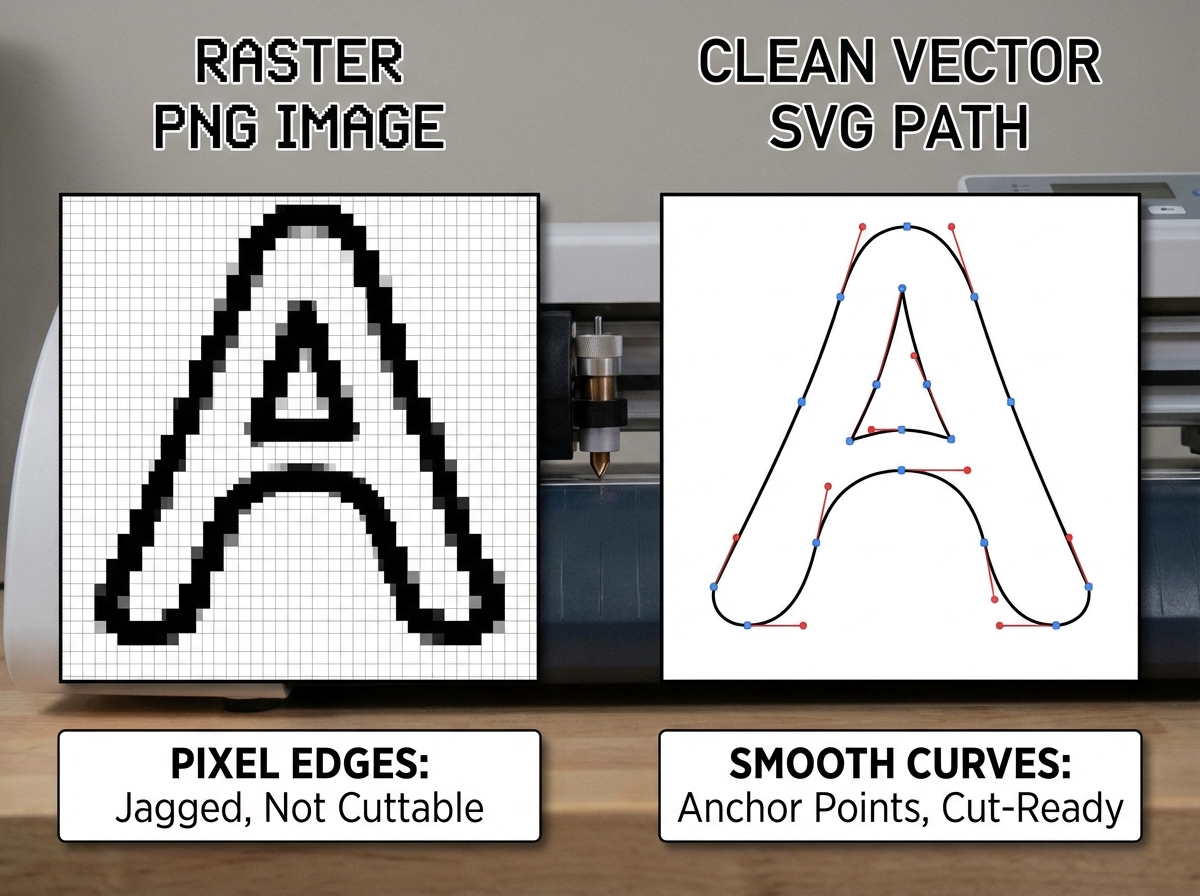
The thing most beginners don’t realize until they’ve wasted a roll of vinyl: your cutter doesn’t read photos or JPEGs. It follows vector paths — mathematical lines and curves defined by anchor points, not pixels. This is why image editing and vectorization aren’t optional extras. They’re the actual foundation.
| File Type | What It Is | Works With Cutter? |
|---|---|---|
| JPEG/PNG | Pixel-based raster image | No — must be converted |
| SVG/AI/EPS | Vector path file | Yes — directly cuttable |
| Vectorized PNG | Raster traced to vector | Yes — after conversion |
Three things that surprise every beginner about vinyl decals:
- Your blade depth matters more than your cut speed — most jams come from wrong blade settings, not software
- Weeding tiny letters at small sizes is harder than any design work you’ll do
- Transfer tape quality determines whether your client’s install looks professional or falls apart
How Long Does It Take to Start Selling Vinyl Decals?
| Stage | Content | Time |
|---|---|---|
| Foundations | Understanding vinyl, vectors, tools, and software setup | 1–2 days |
| Software fluency | WinPcSign + Photoshop basics, preparing files for cutting | 3–5 days |
| Physical production | Cutting, weeding, transfer tape — first clean decal | 1 weekend |
| Store setup | Etsy listing, photos, pricing, SEO tags | 2–3 days |
| First sale | Marketing basics, running a promotion | 1–3 weeks |
| Total | From zero to first paid order | 3–6 weeks |
The order you go through these stages matters far more than how fast you move. Rushing to list before your production quality is consistent is the single fastest way to get bad reviews early.
If the timeline above feels slow for you, that’s normal — most people take a full month just to feel confident with the cutter. That’s not failure. That’s how physical skills develop.
You Think It’s a Design Problem. It’s Not.
Every beginner I’ve talked to starts the same way: they download a cool font, try to cut it at two inches tall, and the cutter chews the vinyl into confetti. Then they blame the machine. Then they blame the software. The real problem is almost always that they never prepared the file correctly.
WinPcSign — the software that talks directly to the GCC cutter — needs clean, closed vector paths to cut accurately. If your design has overlapping nodes, open paths, or hairline gaps you can’t even see at normal zoom, the cutter will either skip sections or drag the blade through parts of the design it should leave intact. Spending thirty minutes inside the software learning to inspect and clean a path before you send it to cut will save you more material than anything else you do in the first month.
Photoshop sits upstream from all of this. You use it to clean up source images — removing backgrounds, adjusting contrast, isolating shapes — before you trace them into vectors inside WinPcSign. The two programs serve completely different purposes, and treating Photoshop as optional is what causes people to import messy files and wonder why their cuts look rough.
The Cutter Setup Nobody Talks About Enough
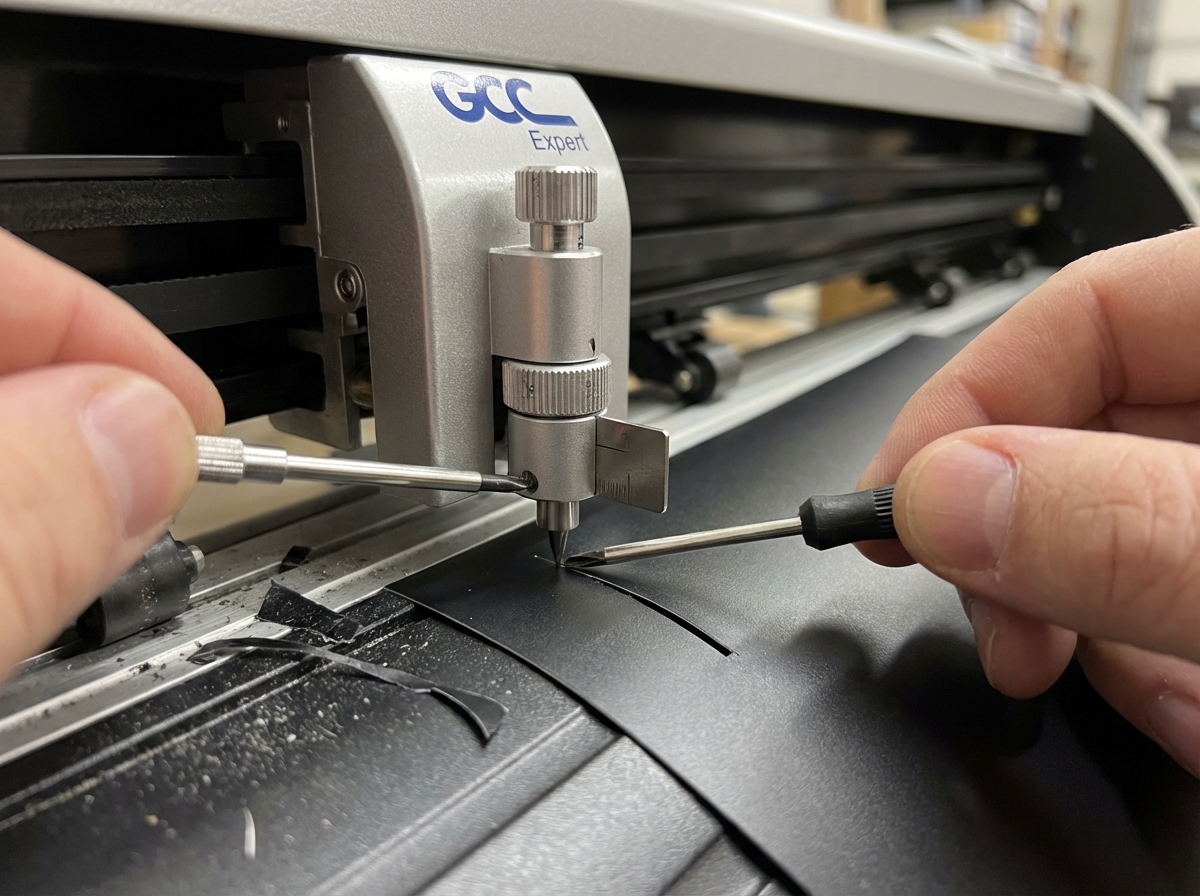
The GCC Expert plotter cutter is one of the more reliable machines in this price range, but it will absolutely punish you for skipping the blade setup. The blade extends from the housing by a specific amount — typically around 0.25mm for standard 60-micron vinyl — and if you set it too deep, the blade drags through the backing paper and your cuts start shifting. Too shallow and it doesn’t cut all the way through, which makes weeding a nightmare.
Replacing and adjusting the blade is a five-minute process once you’ve done it. Before you do it the first time, it feels like defusing something. The key detail: after you adjust depth, always do a test cut on a scrap piece before running your real design. A test cut takes ten seconds. Ruining a full sheet of vinyl and having to restart takes twenty minutes and costs actual money.
The moment things finally clicked for me with the cutter was when I stopped thinking of it as a printer and started thinking of it as a precision knife on a rail. Every setting — speed, force, blade offset — is about controlling how that knife interacts with that specific material. Different vinyl brands, different thicknesses, different temperatures in your workspace. All of it affects the cut.
Weeding and Transfer Tape: Where Patience Becomes a Skill
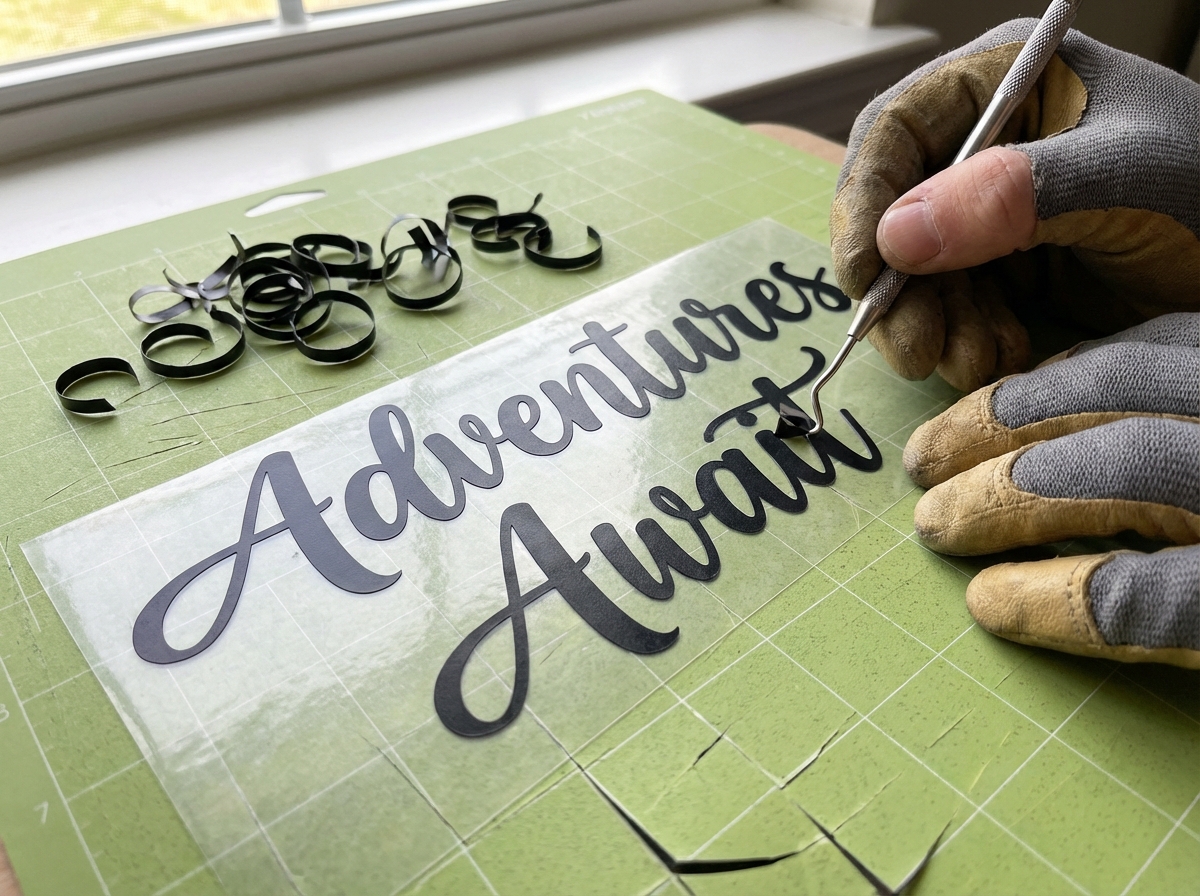
Weeding is the process of removing all the vinyl you don’t want — the negative space around and inside your design. For a simple bold shape, it takes thirty seconds. For a script font with thin strokes and enclosed counters (the holes inside letters like ‘o’, ‘e’, ‘a’), it can take five focused minutes per decal.
The biggest mistake people make when learning to weed vinyl is using the wrong tool angle. A weeding hook works best when you’re lifting from a corner and peeling in the direction of the cut line — not stabbing into the center of a shape. Once you start tearing through thin strokes because you’re going too fast or at the wrong angle, you either restart from scratch or you ship something that doesn’t look right.
Transfer tape goes on after weeding. Its job is to hold your design together as one piece while you position and apply it to a surface. The tape needs to be burnished down firmly — using a squeegee or the back of a credit card — so that every part of the design sticks to it evenly. If you skip this step or rush it, pieces of your design transfer to the surface at different rates, and you end up with bubbles, misalignments, or portions of the design that don’t transfer at all. For anyone planning to sell — your customer is going to apply this themselves, so it has to be idiot-proof.
Setting Up to Sell: The Etsy Listing Is a Product Itself
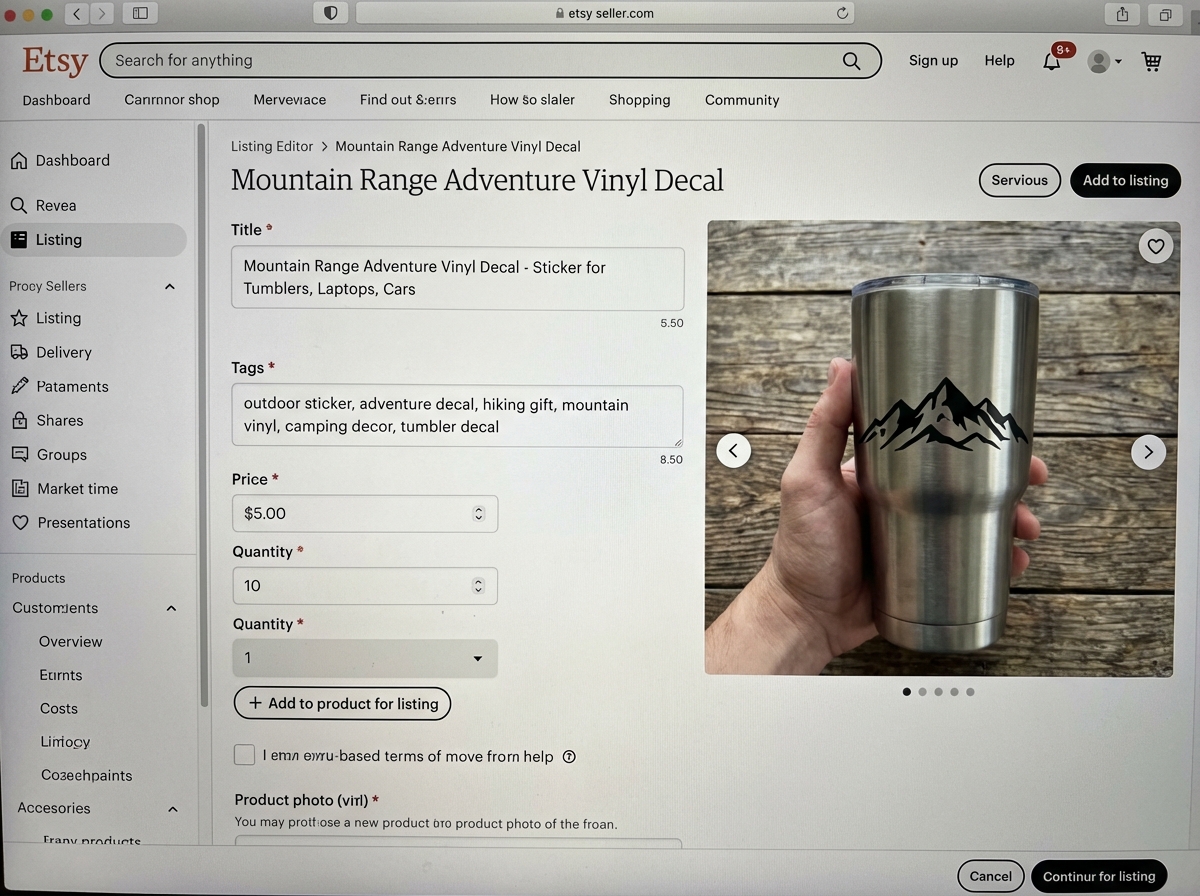
Most people treat the Etsy listing as an afterthought — something you do after the real work is done. That thinking will keep your shop invisible for months. Your listing title, tags, and first photo are doing exactly the same work that a physical storefront window does. If they don’t immediately communicate what the product is and who it’s for, browsers scroll past without a second thought.
When you create a listing for vinyl decals, the photo has to show scale. A decal floating on a white background tells the buyer almost nothing. A decal applied to a laptop, a water bottle, or a car window — shot cleanly with good light — tells them everything: how it looks in real life, how it scales, and whether it fits their aesthetic. That single change in how you photograph your product makes a measurable difference in click-through rate.
Pricing is where most beginners undersell themselves into frustration. Factor in your material cost, time, packaging, and platform fees — then add margin. A vinyl decal priced at $2.99 with free shipping means you’re paying to work. Buyers on Etsy are not exclusively shopping for the lowest price; they’re shopping for perceived value and uniqueness. A decal at $6.99 with a strong listing photo often outsells the same design at $3.99 with a weak one.
Marketing Vinyl Decals Online Without a Following
The thing that trips up almost every new shop owner: they wait until they have ten listings to start promoting, then wonder why nothing moves. Etsy’s algorithm rewards activity — listings that get clicks and saves early in their life rank better. That means your first job after publishing a listing is to drive some initial traffic to it, even manually.
Running a sale on Etsy — even 10% off — triggers a “sale” badge on your listings that increases visibility inside the platform’s own search results. This isn’t a long-term strategy, but for a brand-new shop trying to get its first sale, it costs you almost nothing and moves the needle. Your first sale matters disproportionately: it opens up review-gathering, and five-star reviews compound over time in ways that no ad spend can replicate.
Once you have a few sales and a feel for which designs are getting attention, that’s when paid promotion starts making sense. Before then, investing time into your listing SEO — getting your tags right, writing descriptions that include what people actually search for — will outperform any ad on a brand-new account. Social media helps too, but the people who win early on Etsy almost always do it through organic listing optimization, not Instagram.
Packing and Shipping: The Part That Determines Whether They Come Back
Shipping a vinyl decal sounds trivially simple until you get a message from a customer saying their order arrived creased, folded by the postal service, or with the vinyl partially lifting from its backing. Vinyl is flat and relatively thin — it needs to be packed in a way that prevents bending, even if USPS decides to fold your envelope in half.
Rigid mailers or backing boards inside a poly mailer are the baseline standard. Rolling larger decals around a cardboard tube is the move for anything over twelve inches. Include a small piece of cardboard behind the decal to keep it flat and to absorb any pressure from the outside. These aren’t luxuries — they’re the difference between a five-star review and a refund request.
Etsy’s built-in shipping system is genuinely useful once you understand it. You can print labels directly, get discounted carrier rates, and automatically mark orders as shipped with tracking. The first time you do it end-to-end — confirm order, print label, pack, hand it to the carrier, watch the tracking email go to the customer — is the moment the whole business feels real. Not when you make a great decal. When someone pays you for it and receives it intact.
What I’d Do Differently From Day One
Looking back at the first three months, most of the time I lost was to mistakes I made before I even touched the cutter. The design prep, the file hygiene, the listing photos — those were where the real leverage was. The physical craft was the fun part. The business fundamentals were what actually moved money.
- Vectorize before you cut anything: Run every source image through a proper trace and clean the paths before sending to the cutter. Skipping this step is the source of at least 80% of bad cuts.
- Do a test cut every single session: Blade depth drifts, vinyl thickness varies by brand, and room temperature affects adhesion. A ten-second test cut catches all of it.
- Weed under good light with magnification for small text: A cheap $10 magnifying lamp will save you from discovering a broken letter stroke only after you’ve applied transfer tape.
- Photograph every design on a real surface before listing: White-background shots don’t convert. Context shots do. Use your own products, a friend’s car, anything real.
- Price for profit from listing one: Rethinking pricing after you already have reviews and sales history is painful. Build your margin in from the start.
- Use Etsy’s tag limit fully: All thirteen tags, every time. Each one is a separate search path into your listing. Unused tags are wasted visibility.
- Pack with rigidity, not just padding: Bubble wrap doesn’t prevent bending. A cardboard backer inside a rigid mailer does. This is what keeps your reviews clean.
- Ship within your stated processing time, always: Late shipments are the fastest way to damage a new shop’s standing. If you can’t meet the window, adjust the processing time in your settings before it becomes a problem.
Leave a Reply